This is Part 2 of the 2-post series. See Part 1 if you haven’t yet.
Hacked together sensor reporting since #Intel provides free analytics platform. Blog post soon. #Golang #IoT pic.twitter.com/WllvBPLr8j
— gmarik (@gmarik) February 19, 2016
In this post we’ll go through the process of configuring and running sensor-reporter and submitting the sensor metrics to the EnableIoT platform
Plan
Assuming you’re already registered with the EnableIoT platform, here’s the action plan of this post:
- Install iotkit-cli
- Create User Access Token
- Create an Account
- Create and activate a Device
- Create component type
- Create a Component
- Verifying the setup
- Deploying and running on the Intel Edison
Getting iotkit-cli
iotkit-cli is a command line utility that helps work with EnableIoT platform. It covers some missing functionality in UI and is just a wrapper around the API.
Installation is pretty straightforward:
go get github.com/gmarik/go-iotkit/iotkit-cli
but requires having Go installed on your system. For sake of convenience install it on your computer instead of Intel Edison.
Once installed, run it to get a brief overview of its capabilities:
$ iotkit-cli
Usage: iotkit-cli <flags> <subcommand> <subcommand args>

Subcommands:
	auth:login                get the authenticate token
	device:activate           activate device and return device token
	device:component:create   create deveice component
	observation:submit        submit single observation
	commands                  list all command names
	flags                     describe all known top-level flags
	help                      describe subcommands and their syntax
  uuidgen                   generates a UUID
Creating an Account
This “Account” is a device account and differs from the user account one gets after registration.
Create new Account, which is required for further registration of devices and components.
Once created, copy and save the Account ID from the Account details.
The id will be involved in all further operations.
For consistency let’s capture account id in our bash environment, with:
$ ACCOUNTID=the_id_string_here
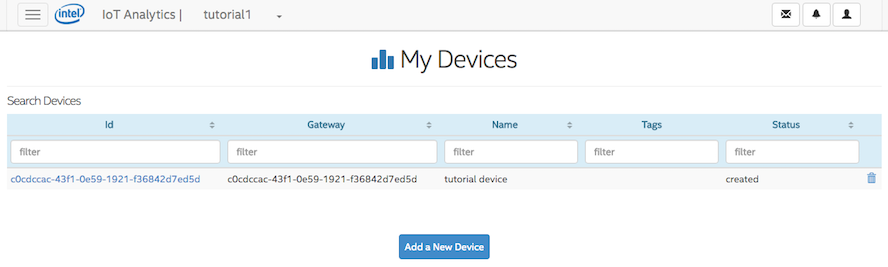
Creating a Device
ID must be a unique UUID identifier; it’s easily generated with:
$ DEVICEID=$(iotkit-cli uuidgen)
$ echo $DEVICEID # to view it
in your shell.
Set Gateway the same as ID(changeable later).
Once created, devices list will contain the created device:
Activating the created Device
Requires an activation code which is available at account details page
Having the activation code, ACCOUNTID, USERTOK, DEVICEID ready, we can now activate the created device like this:
DEVICETOK=$(iotkit-cli device:activate -activation-code AbCdeF -account-uuid $ACCOUNTID -device-uuid $DEVICEID -account-token $USERTOK)
which also captures the token into DEVICETOK variable for later use.
Component Types
Before creating component it’s necessary to determine its type. EnableIoT platform, at the time of writing, supports 3 types out of the box which can be seen in Component Types Catalog (click Catalog tab) Those types are: Humidity, Power Switch, Temperature.
For the sake of the example we’re going to create a custom type that will be later used to create light sensor component.
So in order to create component click Add New Catalog Item in the Catalog tab. You’ll see the dialog input to configure the type:
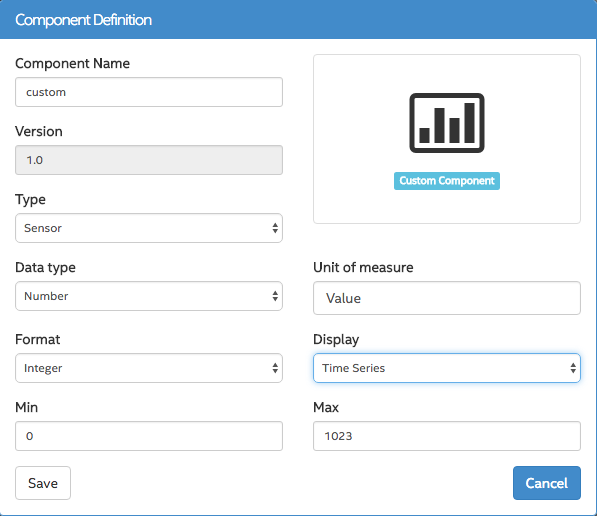
Clicking save completes the creation process.
Creating a Device Component
Requires a unique UUID which, again, could be done like this:
$ COMPONENTID=$(iotkit-cli uuidgen)
Once we have COMPONENTID (along with ACCOUNTID, DEVICEID, DEVICETOK) component creation is done with:
$ iotkit-cli device:component:create -type custom.v1.0 -name test -uuid $COMPONENTID -account-uuid $ACCOUNTID -device-token $DEVICETOK -device-uuid $DEVICEID
Component "8c01fdb6-0ed6-6e37-8f41-39e447f2c417" created.
Submitting Sensor readings
At this point all prerequisites, to report sensor readings, are satisfied and we’re now ready to start pushing data to the platform.
In order to test the setup there’s an example reporter that can generate random values to simulate a sensor:
Install the sensor-reporter
go install github.com/gmarik/go-iotkit/examples/sensor-reporter
and running it:
sensor-reporter -kind random -delay 1s -flush-size 1 -component-uuid "$COMPONENTID" -device-token "$DEVICETOK" -device-uuid "$DEVICEID" -account-uuid "$ACCOUNTID" -verbose true
will start outputting something like this
2016/04/09 18:04:09 Reader for kind: random
2016/04/09 18:04:10 Read: 545 <nil>
2016/04/09 18:04:10 Observation: iotkit.Observation{ComponentId:"8c01fdb6-0ed6-6e37-8f41-39e447f2c417", On:iotkit.Time{sec:63595836250, nsec:213273041, loc:(*time.Location)(0x5970a0)}, Value:"545", Attributes:map[string]interface {}(nil)}
2016/04/09 18:04:10 Submitting batch; size:  1
2016/04/09 18:04:11 Read: 527 <nil>
2016/04/09 18:04:11 Observation: iotkit.Observation{ComponentId:"8c01fdb6-0ed6-6e37-8f41-39e447f2c417", On:iotkit.Time{sec:63595836251, nsec:214676446, loc:(*time.Location)(0x5970a0)}, Value:"527", Attributes:map[string]interface {}(nil)}
2016/04/09 18:04:11 Submitting batch; size:  1
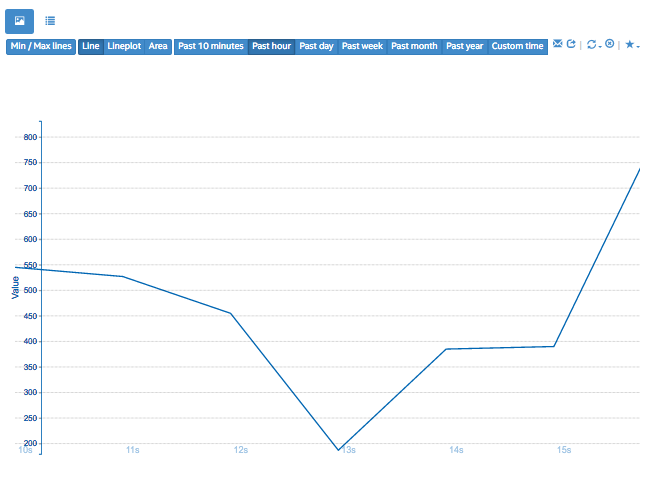
Which means it’s just successfully sent 2 values 545, 527 from out random sensor.
To verify, go to charts section, check off all the devices and components and you should see something like this:
Deploying and running on the Intel Edison
Cross compiling for the Intel Edison
In order to run sensor-reporter on the Intel Edison it’s required to compile sensor-reporter for the target platform: Luckily it’s trivial since Go 1.5 and is done as:
GOOS=linux GOARCH=386 go build -o sensor-reporter-linux-386 github.com/gmarik/go-iotkit/examples/sensor-reporter
Deploying to the Intel Edison device
One of the ways to get binary to the device is through ssh using scp command:
$ scp ./sensor-reporter-linux-386 [email protected]:~/sensor-reporter
This assumes that the device is running, has network and ssh running, and the device’s network name is intel-edison.local
Configuring systemd service
Create and edit a file named sensor-reporter-light.service with the content:
[Unit]
Description=sensor-reporter light pin-3

[Service]

#
# set your values accordingly
#
Environment='ACCOUNTID=************************************'
Environment='DEVICEID=************************************'
Environment='DEVICETOK=**********'
Environment='COMPONENTID=************************************'

# lightsensor
Environment='SENSORPIN=3'
ExecStart=/home/root/sensor-reporter -pin $SENSORPIN -delay 30s -flush-size 12 -component-uuid $COMPONENTID -device-token $DEVICETOK -device-uuid $DEVICEID -account-uuid $ACCOUNTID

Restart=always
In above configuration sensor-reporter reads sensor value from pin 3 every 30s(delay) and submits the batch once it collects 12(flush-size) observations.
Deploying the systemd configuration
Is done through ssh as well:
$ scp ./sensor-reporter-light.service [email protected]:/etc/systemd/system/multi-user.target.wants/
Running the sensor-reporter with systemd
Starting service through ssh is trivial:
$ ssh [email protected] 'systemctl start sensor-reporter-light'
Verifying the state is done:
$ ssh [email protected] 'systemctl status sensor-reporter-light'
And should look somewhat like this:
● sensor-reporter-light.service - sensor-reporter light pin-3
   Loaded: loaded (/etc/systemd/system/multi-user.target.wants/sensor-reporter-light.service)
   Active: active (running)
 Main PID: 7138 (sensor-reporter)
   CGroup: /system.slice/sensor-reporter-light.service
           └─7138 /home/root/sensor-reporter -pin 3 -delay 30s -flush-size 12 -component-uuid *** -device-token *** -device-uuid *** -account-uuid ***

Apr 09 22:44:01 intel-edison systemd[1]: Started sensor-reporter light pin-3.
See systemd documentation for more details how to work with its services.
Summary
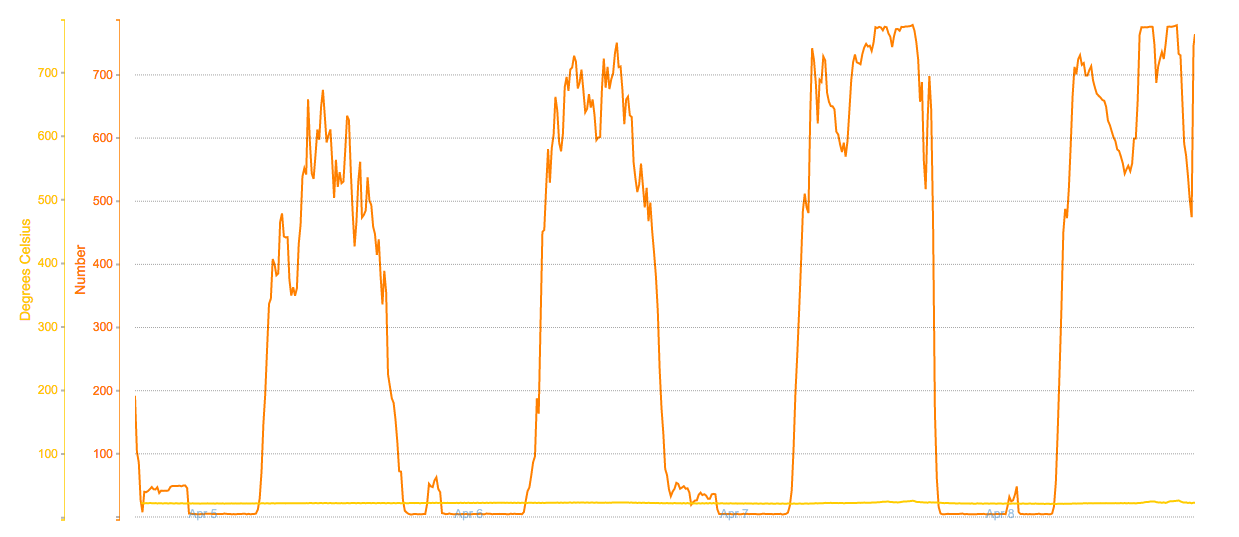
At this point you should be able to observe the charts updating directly from the device.
Here’s my light and temperature sensors charted:
Thank you!